


Welcome back! Today I want to share a comprehensive guide on how to connect and configure a GitLab runner, useful for anyone running a self-hosted or cloud GitLab instance.
Objective
Execute a pipeline on every commit made to GitLab.
What is a Runner?
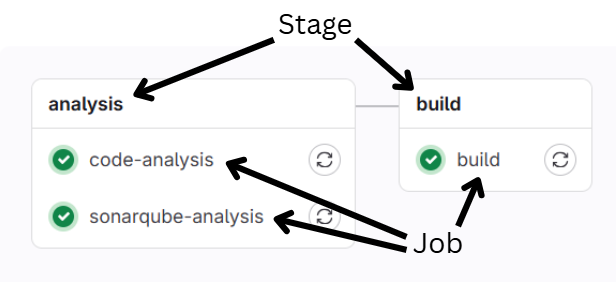
In GitLab, a pipeline consists of multiple steps called Jobs (build, test, lint, deploy), grouped into Stages.
To execute a job, you need an active Runner—essentially an agent responsible for performing the actual work (if it’s a build job, the runner will compile the code).
When purchasing a GitLab Cloud plan, you get a certain number of execution minutes included, and you can purchase additional execution time if needed.

However, if you have a self-hosted instance (like in my case), you won’t have any pre-configured runners available. In this scenario, setting up your own runner is mandatory if you want to leverage pipeline functionality.
Alternatives
Before we begin, I should mention that alternatives exist for both cases (GitLab Cloud or self-hosted): one of the most popular and free tools is Jenkins, which can be configured to perform actions based on specific events (e.g., commits). Every business environment is different and needs to be evaluated case by case—it’s up to you to decide whether to keep everything within a single tool or use multiple specialized tools.
Prerequisites
The advantage of having a self-hosted runner is that we don’t need to worry about time limits and can execute as many jobs as we want. However, we need to provision a machine to run them on.
When I configured runners at my company, our system administrators provided me with a Linux virtual machine rather than a physical one—in this case, they decide and we adapt.
Regardless, there are some requirements: the machine must run Linux and have Docker (or Podman) installed. This is because we’ll run the runners inside containers (for decoupling, maintainability, and flexibility reasons).
Types of runner
There are three types of runners:
- Instance runner: Once configured, it will be available for all repository projects
- Group runner: Available only for projects belonging to a specific group
- Project runner: Dedicated to a single project
You’ll choose based on your repository and project structure.
If you have projects that are more critical than others, it’s strategic to have a dedicated runner per project or group. Consider that each runner can execute N jobs simultaneously (N is defined in the configuration). Having a dedicated runner for a project means the pipeline will start immediately on every commit; otherwise, it will queue.ontemporanea (N è definito nella configurazione), avere un runner dedicato ad un progetto significherà che ad ogni commit la pipeline partirà immediatamente, in caso contrario andrà in “coda”.
Step 1: Creating a Runner in GitLab
Depending on the runner type, we’ll need to navigate different menus to reach the creation page. In any case, connect to your GitLab instance with an account that has administrator privileges.
Instance runner
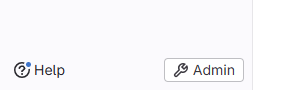
Click the Admin button in the left sidebar at the bottom
Click on CI/CD → Runners
Click the blue “Create instance runner” button.

Group runner
Click on the group from the left sidebar and choose Build → Runners

Click the blue “Create group runner” button.

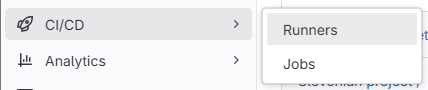
Project runner
Click on the project details, then click on Settings → CI/CD
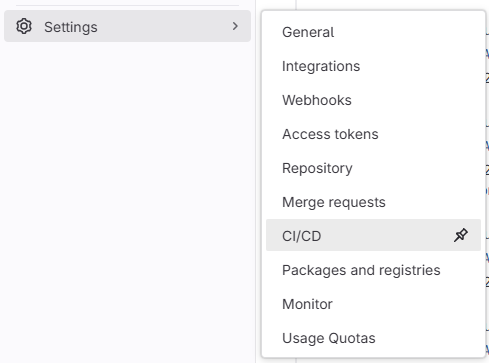
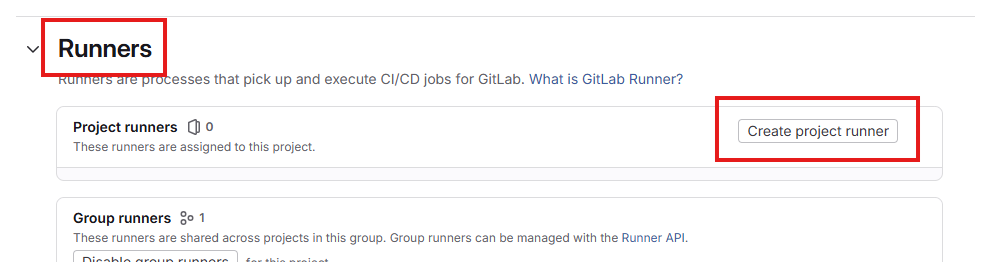
A page with various configurations will open—expand the “Runners” box and click “Create project runner”.
Regardless of the type chosen, you’ll arrive at this page (the title at the top shows the runner type, but everything else is identical):
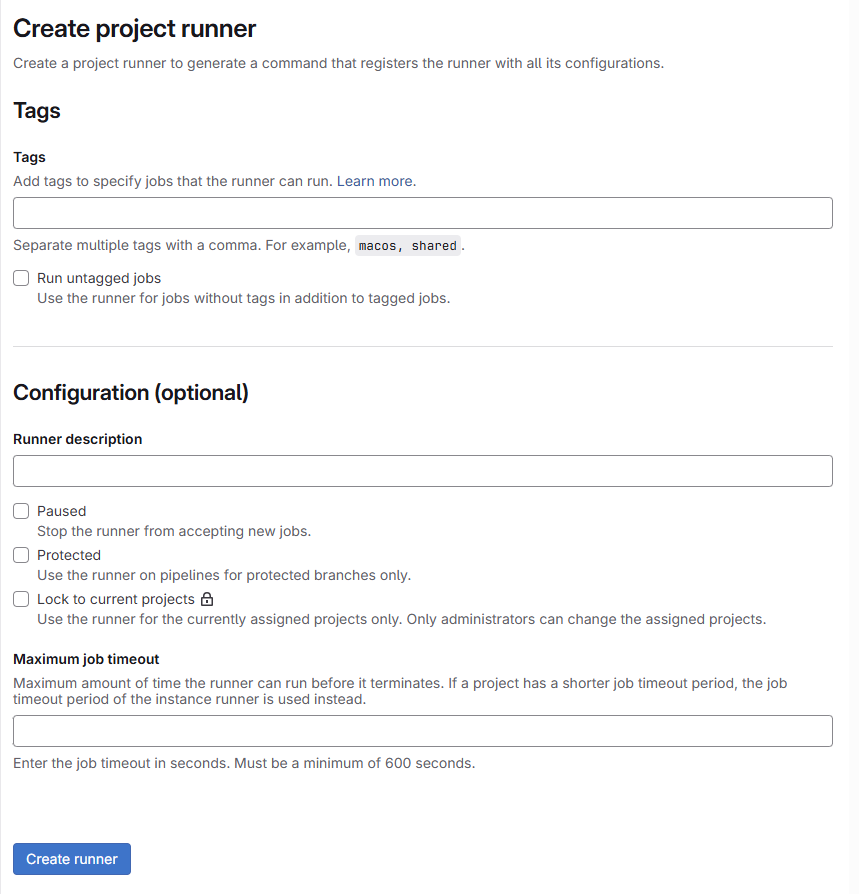
Tags
Tags are used to call the correct runner based on the job. If I have a project with a .NET backend and Angular frontend, I’ll need two runners, one for each language. In the pipeline, I’ll call the correct runner using tags.
Runner description
Please, add a description! There’s nothing worse than finding yourself with 15 runners and no descriptions 🙂
Once we’ve entered the information, click “Create runner”. The following page will appear:
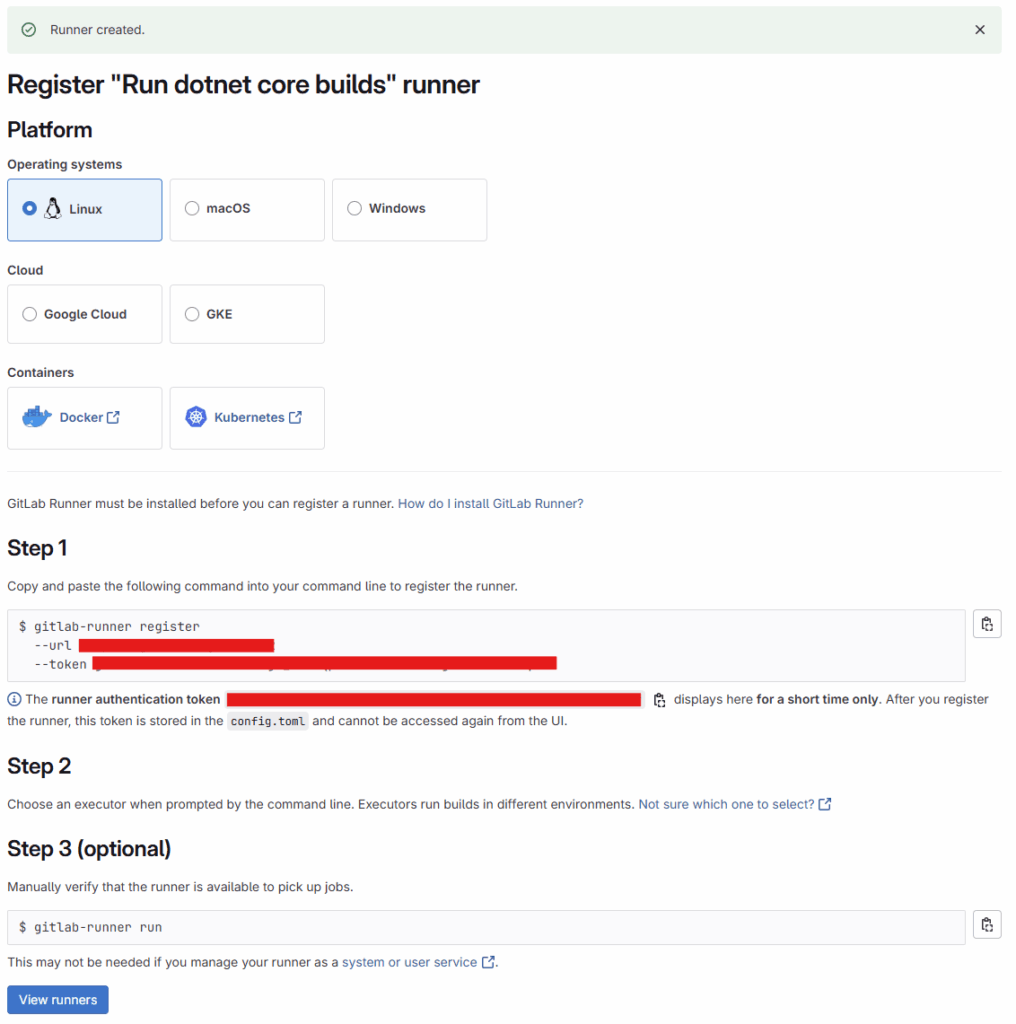
Keep this page open and don’t close it—we’ll need the generated token soon.
Step 2: Starting the Docker Runner Container
Now we need to insert the token generated by GitLab into the container configuration.
Connect to the machine where we’ve decided to start the Docker container, create a dedicated folder, and generate a file called docker-compose.yml using this command:
nano docker-compose.ymlPaste this content:
version: '3.8'
services:
  gitlab-runner:
    image: gitlab/gitlab-runner:latest
    container_name: gitlab-runner
    restart: always
    volumes:
      - <local_path_of_configuration>:/etc/gitlab-runner
- /var/run/docker.sock:/var/run/docker.sockSave and exit (CTRL+X then Y to save).
Start the Docker Compose with:
docker compose up -dNow that the container is running, we need to execute the registration command through its shell:
docker exec -it <contianer_id> gitlab-runner register --url <gitlab_url> --token <gitlab_token>Follow the procedure to completion, making sure to select docker as the executor. This is crucial because it makes this configuration operating system independent. The runner will start a Docker container every time it needs to execute a job action. If we’re configuring the runner to compile Angular, we’ll use node-alpine:current as the image; for a .NET Core project, we’ll use mcr.microsoft.com/dotnet/sdk:9.0.
If everything went well, you’ll see a config.toml file appear in the “config” directory on your machine—this is the runner’s configuration file.
A single container can manage multiple runners, but in GitLab each runner appears as a separate line. A runner doesn’t necessarily correspond to a dedicated Docker instance—multiple runners can be tied to a single container.
Step 3: Runner Configuration
Here’s an example configuration for the config.toml file:
concurrent = 4
check_interval = 0
connection_max_age = "15m0s"
shutdown_timeout = 0

####### Logs #######
#log_level = "debug"
#log_format = "text"
###################

[session_server]
  session_timeout = 1800

######### Angular runner ############
[[runners]]
  name = "angular-runner"
  url = "<gitlab_endpoint>"
  id = 1
  token = "<gitlab_runner1_token>"
  token_obtained_at = 2025-07-09T14:50:10Z
  token_expires_at = 0001-01-01T00:00:00Z
  executor = "docker"
  [runners.cache]
    MaxUploadedArchiveSize = 0
    [runners.cache.s3]
    [runners.cache.gcs]
    [runners.cache.azure]
  [runners.docker]
    tls_verify = false
    image = "node-alpine:current"
    privileged = false
    disable_entrypoint_overwrite = false
    oom_kill_disable = false
    disable_cache = false
    volumes = ["/cache"]
    shm_size = 0
    network_mtu = 0
    memory = "4g"  #Max 4GB RAM
    cpus = "4"    #CPU Limit

######### Dotnet runner ############
[[runners]]
  name = "dotnet-runner"
  url = "<gitlab_endpoint>"
  id = 3
  token = "<gitlab_runner2_token>"
  token_obtained_at = 2025-07-10T08:41:03Z
  token_expires_at = 0001-01-01T00:00:00Z
  executor = "docker"
  [runners.cache]
    MaxUploadedArchiveSize = 0
    [runners.cache.s3]
    [runners.cache.gcs]
    [runners.cache.azure]
  [runners.docker]
    tls_verify = false
    image = "mcr.microsoft.com/dotnet/sdk:9.0"
    privileged = false
    disable_entrypoint_overwrite = false
    oom_kill_disable = false
    disable_cache = false
    volumes = ["/cache"]
    shm_size = 0
    network_mtu = 0
    memory = "4g"  #Max 4GB RAM
cpus = "4" # CPU LimitLet’s analyze this configuration:
- The configuration handles both an Angular project (first runner) and a .NET 9 project (second runner)
- The runner creation procedure (Step 1 + Step 2) was executed twice on the same container
- Any changes made to the
config.tomlfile are immediately recognized—no need to restart the container - It’s good practice to limit CPU and memory usage to avoid overloading the system and making it unresponsive
concurrent = 4at the top indicates it will execute a maximum of 4 jobs in parallel
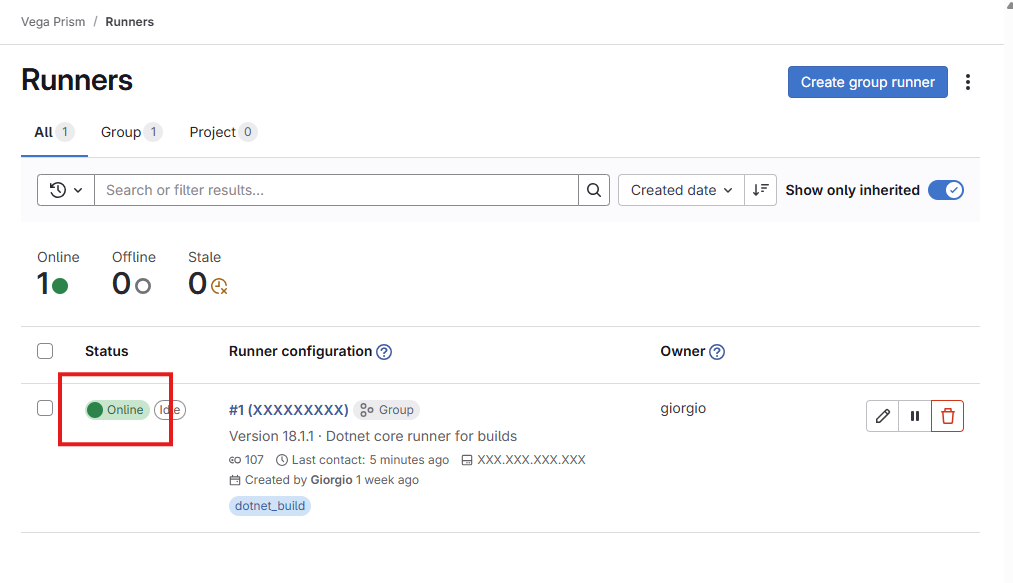
Finally, return to GitLab and click the “View runners” button (found at the bottom of the page you left open). Under status, you should see a green Online indicator.
Debugging and Troubleshooting
If something goes wrong, you’ll need to view the container logs to understand the problem. First, I recommend enabling debug-level logging (you’ll find the commented example above).
Once enabled (no need to restart the container), you can view the logs with:
docker logs -f <container_id>I’ve experienced cases where the firewall blocked certain calls made with PUT and PATCH verbs—I found and resolved the issue through the logs.
Step 4: Pipeline Gitlab
It’s time to test the entire process. For this, I’ll use a simple .NET 9 project where I’ll execute a build on every commit.
Create a new project and add the GitLab pipeline in the .gitlab-ci.yml file at the project root:
stages:
  - build

variables:
  DOTNET_CLI_TELEMETRY_OPTOUT: "1"
  DOTNET_NOLOGO: "1"

before_script:
  - export PATH="$PATH:/root/.dotnet/tools"
  - dotnet --version

build:
  stage: build
  image: mcr.microsoft.com/dotnet/sdk:9.0
  script:
    - dotnet restore
    - dotnet build --configuration Release --no-restore
  artifacts:
    paths:
      - '**/bin/**'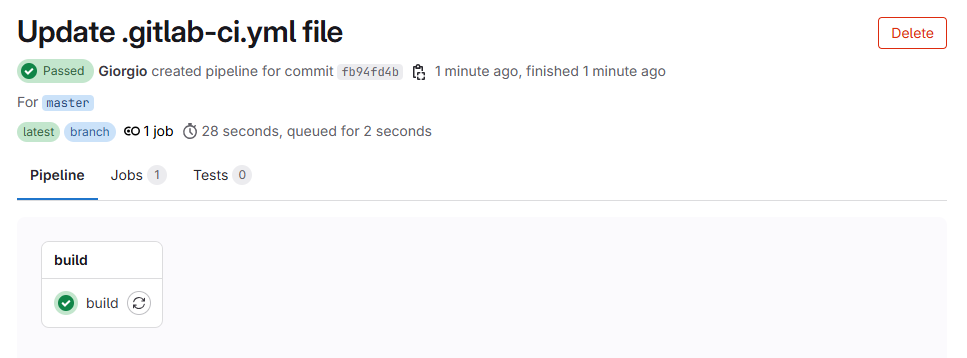
expire_in: 1 hourIn GitLab, the result will look like this:


Conclusions
To execute a pipeline in GitLab, you need a runner, and in this article we’ve seen how to install and configure one.
Having an analysis pipeline that runs on every commit is a best practice and strategically important. Not only can we verify that our application compiles, but we can also add additional analysis steps (e.g., SonarQube, vulnerability detection, bug detection, etc.) or automatic deployment steps to our environments (test, staging, production).
Thanks for your attention, see you in the next article!