


Hello everyone,
Today, I want to explore a topic I’m passionate about that’s becoming increasingly central to modern living: home automation and the IoT ecosystem.
In today’s world, home automation remains a luxury. Those wanting to automate their homes typically need to hire specialized companies at considerable expense. What’s more, there are countless approaches to home automation, and without technical expertise, it can be challenging to determine the optimal solution for your specific needs.
I’d like to share how I designed and implemented a home automation system in my house (which wasn’t originally built with automation in mind), the choices I made along the way, and the challenges I encountered.
I have no affiliations with any brands mentioned in this article; my selections are based entirely on my own research and experience.
Project goals
Every solid project should begin with clear objectives. For my home automation system, I wanted to:
- Control home lighting via both the app and the voice assistant
- Create custom scenes triggered by specific events (e.g., automatically turning off all lights when leaving home)
- Maintain independence from any single manufacturer’s ecosystem
- Build a resilient system that could be quickly restored with minimal effort if anything failed
The first goal represents what most people want from home automation. The second—creating event-based scenes—is now standard in commercial systems: scenes for arriving home, leaving, relaxation modes with specific lighting, and so on.
Avoiding vendor lock-in presents the first significant challenge. Many brands operate in closed ecosystems that don’t interface with third-party solutions. This is a major drawback as it constrains you to operating solely within the manufacturer’s walled garden, forcing compromises on functionality.
Finally, system resilience is crucial. Electronics inevitably fail—that’s just reality. What happens when the computer managing your entire smart home crashes? You need a strategy to restore functionality quickly and seamlessly.
Assessing the environment
When I moved into my current home, I inherited an existing electrical system. This meant I couldn’t implement a dedicated bus-based automation system (separate from power lines).
A friend of mine took the approach of connecting every component (lights, outlets, switches) to a central PLC system housed in a dedicated cabinet. At the software level, he programmed each button’s function. While this offers tremendous flexibility, it comes at a premium price point and requires significant physical space to centralize all wiring.
My situation demanded a less comprehensive solution that would adapt to my existing infrastructure. I needed to evaluate either smart switches or modules that could be installed within existing electrical boxes.
Selecting hardware
Initially, I considered Bluetooth-enabled smart switches that connected to a central gateway device.
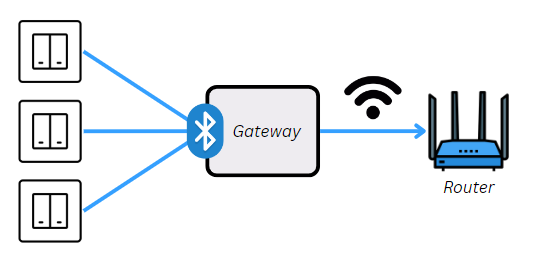
I ultimately rejected these for two reasons: most manufacturers using this approach don’t support third-party integration (you’re limited to their proprietary app), and with roughly a hundred switches needed throughout my home, the cost would have been prohibitive.
After evaluating numerous options, I settled on devices from Shelly.

I had previously experimented with these devices and was familiar with their capabilities. Moreover, a friend had successfully used them to automate his entire home in a situation similar to mine.
The key advantages that led me to choose Shelly include:
- Independence: While they work natively with Shelly’s cloud platform, they can also operate with a local MQTT server without internet dependency. Many competing products become paperweights without internet connectivity.
- Form factor: Shelly devices are compact enough to fit inside standard electrical junction boxes
- Quality: The devices are well-constructed and carry appropriate safety certifications
Server selection
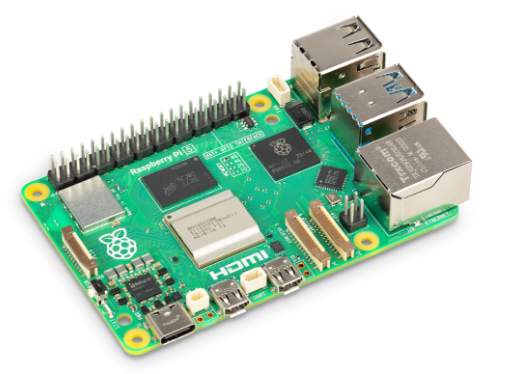
As a Raspberry Pi (❤️) enthusiast, I already own several, including a Raspberry Pi 5 with 4GB RAM—an easy choice for this project. That said, the approach I’ll outline doesn’t specifically require a Raspberry Pi; you could use virtually any computer (even an older one). The primary advantage is the Raspberry Pi’s minimal power consumption.
Operating system
Having chosen a Raspberry Pi, Raspberry Pi OS—a Debian-based distribution specifically optimized for this hardware—was the natural choice. Alternatives could include other Linux distributions like Debian or Ubuntu Server. My recommendation is to use a lightweight, headless distro without a GUI to minimize resource overhead.
Software platform
Several free, open-source options exist for home automation: Home Assistant, CasaOS, and others. I selected Home Assistant for its unparalleled flexibility and extensive integration capabilities (both pre-built and custom). This platform offers various installation methods and provides a premium subscription option for remote access, though free alternatives exist, as we’ll discuss later.

Building resilience
One of my core objectives was creating a resilient solution that could be quickly restored with minimal effort if the server failed. To achieve this, I deployed Home Assistant using Docker. Docker provides virtualization that allows applications to run in isolated “containers” atop the operating system. It’s widely adopted in both enterprise and hobbyist contexts, with abundant documentation available.
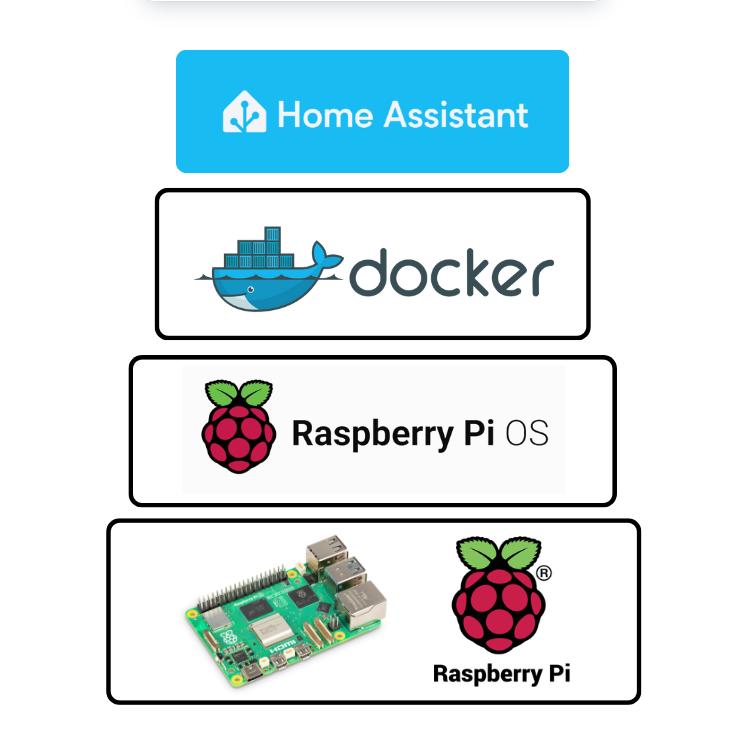
Home Assistant can be installed either as a Docker image (which introduces some complexity in certain configurations) or as a purpose-built operating system (based on Debian) deployed directly on the Raspberry Pi.
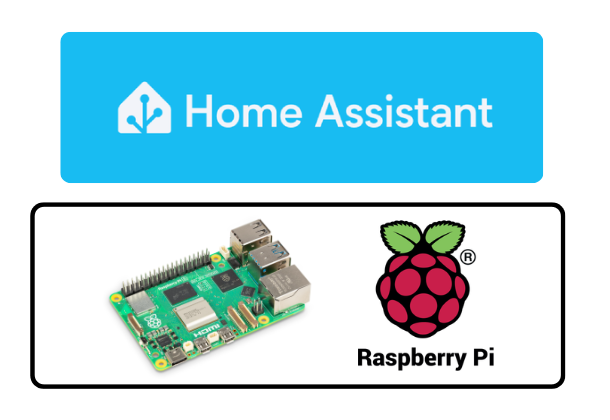
The latter approach offers significant advantages in terms of simplicity, direct OS integration, and streamlined configuration management. I’d recommend this path for beginners or those seeking a more turnkey solution.
However, the Docker approach provides a crucial advantage: once configured, containers are portable and can run anywhere. The system becomes independent of the specific hardware it’s running on, whether that’s a Raspberry Pi or any other computer. Additionally, you can run other containerized applications on the same server. This means if your Raspberry Pi fails catastrophically, you simply need to migrate the Docker containers with their configurations to new hardware and launch them (versus having to restore from backups and reconfigure everything).
I chose the Docker installation since my Raspberry Pi hosts various applications beyond just Home Assistant.
Backup strategy
Without robust backups, you can’t ensure recoverability. I created a bash script that runs nightly to back up all containers, volumes (the folders containing Docker application data), and application configurations to both a separate partition on the Raspberry Pi and to cloud storage (provider of your choice).
This off-site backup is particularly critical—having an external copy separate from your main system follows the fundamental 3-2-1 backup principle (3 copies, 2 on different local media, 1 off-site). While nobody wants to think about it, if lightning were to fry your server and that was your only backup location, you’d lose everything permanently! 😥
Security considerations
With home automation and IoT devices, security often takes a backseat to features in manufacturers’ priorities. I’ve encountered systems with security so poor it’s almost inconceivable—home alarm systems exposed to the internet protected by nothing more than a short numeric PIN, for instance. Similarly, many security cameras have well-documented vulnerabilities or backdoors (Hikvision cameras were notably criticized for backdoors enabling unauthorized remote access).
Security must be a foundational consideration in your design phase. For security cameras, I selected only PoE (Power over Ethernet) models from Hikvision (no WiFi!), as they offer an excellent quality-to-price ratio. To mitigate potential security risks, I isolated all cameras on a completely separate network—they have no internet access, and only the NVR can access them. The NVR itself sits on a different network segment protected by strict firewall rules (using dual network interfaces—one connected to my main network, the other to the camera network).
I deliberately avoided WiFi cameras for two reasons: they’re vulnerable to signal jammers, and they present additional attack vectors (potential exploitation of wireless vulnerabilities).
It’s worth remembering a fundamental truth: the only truly secure computer is one disconnected from any network. Perfect network security is impossible—vulnerabilities always exist. The goal is to minimize your attack surface.
For my networking infrastructure (modems, routers, switches), I chose Unifi Ubiquity equipment, which offers professional-grade network management capabilities. I’ve been extremely satisfied with this choice; previously, I had used TP-Link devices that caused numerous headaches regarding both reliability and configuration flexibility. Ubiquity is more expensive but delivers value far exceeding lower-end alternatives.
Remote access solution
After configuring your home server, how do you securely access it when away from home? The answer is not port forwarding—that’s equivalent to locking every door in your house but leaving a window wide open, hoping nobody notices.
The secure approach is to implement a VPN on your server. Once configured, you’ll need to set it up on your devices (phones, laptops) to enable remote access.
You can further optimize by configuring split tunneling—routing only traffic destined for specific addresses (like your home server’s IP) through the VPN rather than all traffic. My home internet has limited upload bandwidth (20Mbps), so routing all my mobile traffic through it would create a bottleneck. With split tunneling, my VPN stays connected constantly, but only traffic headed to my home server passes through it—everything else uses my mobile connection directly.
Conclusion
In this article, I’ve shared my experience building a home automation system in a house with no pre-existing automation infrastructure, demonstrating how you can create a functional, flexible, and secure setup without expensive professional installations or completely rewiring your home.
The objectives I established — controlling lighting via app/voice, creating customized scenes, maintaining vendor independence, and ensuring system resilience — were all achieved through thoughtful hardware and software selections.
Choosing Shelly devices proved advantageous due to their cloud independence, compact size that fits existing electrical boxes, and excellent build quality. For the central system, the combination of Raspberry Pi 5, Docker, and Home Assistant creates a powerful, flexible platform that can be quickly restored should anything fail.