


Hi everyone! Today I want to share a project I implemented at home to combat an unwelcome tenant that’s often present in our homes but extremely harmful to our health: radon gas ☢️.
Radon is a naturally occurring radioactive gas that’s colorless and odorless, formed by the decay of uranium present in rocks and soil. It’s the second leading cause of lung cancer after cigarette smoking. Radon can accumulate in buildings, especially in basements and lower levels, infiltrating through cracks in foundations or floors.
The problem
My wife was the first to become interested in this topic, and we asked ourselves: could this be an issue in our home too?
The first step in understanding any phenomenon is measuring it. In 2022, I purchased an AirThings sensor that detects radon and can be connected to my Home Assistant setup.

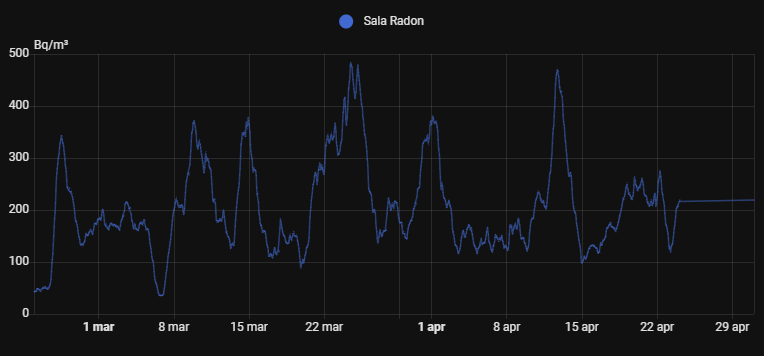
We placed the device in our basement, and after 3 months we analyzed the situation. Yes, radon was present with an average concentration of 200 Bq/m³ (with peaks of almost b☢️), well above the 100 Bq/m³ limit—very dangerous for long-term health.
My house also has a crawl space—a “buffer” zone between the ground and the ground floor—connected to the outside by several pipes that allow natural ventilation. This should enable natural radon outflow to the exterior, but the concentrations were so high that it wasn’t sufficient.
The solution
The first action I took to mitigate this phenomenon was opening windows in micro-ventilation mode. This allowed slight air exchange and helped lower the detected values somewhat.
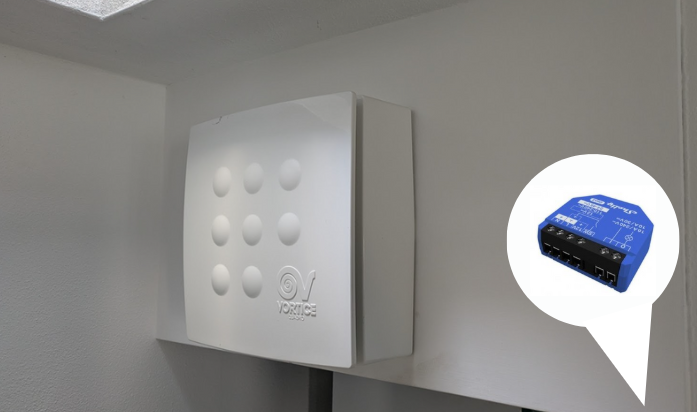
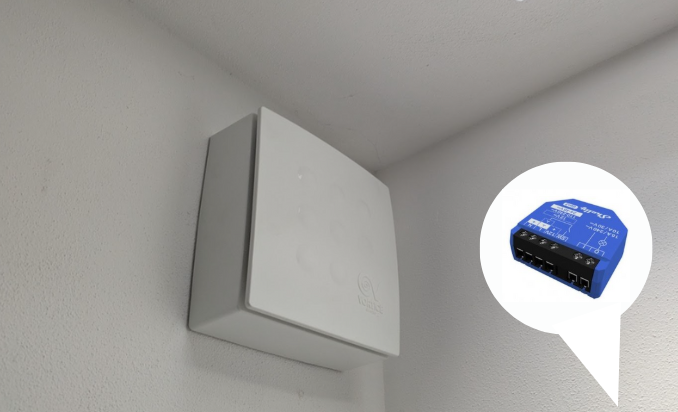
I needed to do more, so I decided to automate two Vortex fans that were already installed. I didn’t want to run them all day and didn’t want to rely on manual operation. I made my fans smart by connecting them to Shelly devices and created a scene that normally activates them during the night, forcing air exchange and further reducing radon concentration.
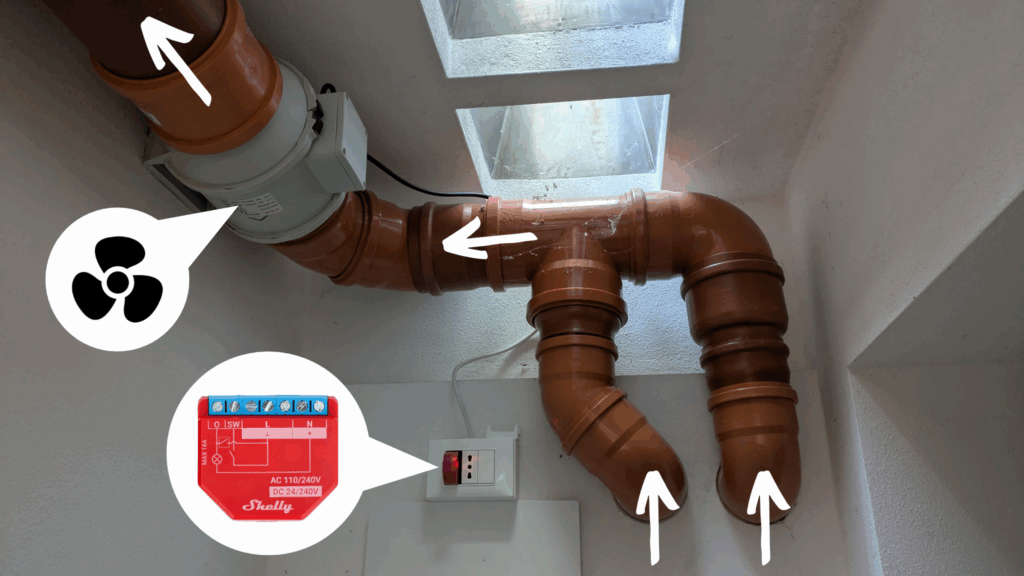
Finally, wanting to improve the situation further, I connected two pipes communicating with the crawl space to a motor that extracts air and vents it outside. This solution was also made smart using Shelly, but the results from this final step didn’t seem to significantly change the measured values.
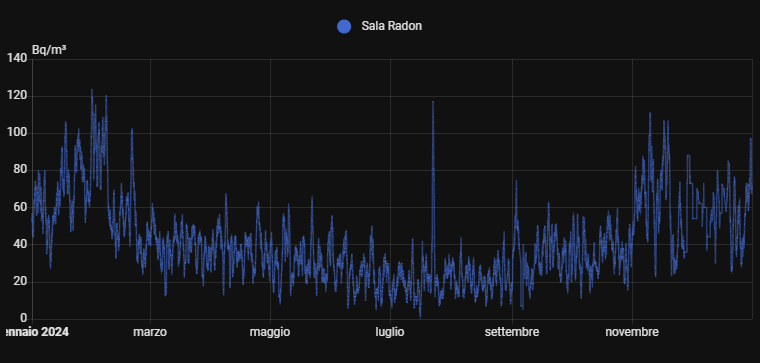
Over these years, I’ve noticed that radon concentration is very unpredictable and fluctuates based on events like rain, summer, or winter. What I can tell you for certain is that with these actions, the level never exceeds 120 Bq/m³ (during winter when the house stays more closed and levels increase) and averages 20-30 Bq/m³ in summer and 60-70 Bq/m³ in winter. You can see radon level of 2024 in the image above:
Let’s see how I made the fans “smart.”
Requirements/materials
- Shelly (shop link) – 1 per fan
- Airthings (website link)
- Wifi coverage (or using LoRa addon)
Warning Always turn off power at the breaker and work safely when dealing with electrical installations.
Starting situation
My starting situation was as follows:

Both fans were connected to a switch so they could be operated manually when needed. I therefore had to install my Shelly between the switch and the fan.
Vortex – Shelly installation
Una volta rimossa la corrente ho carcato smontato la placca con l’interruttore, in modo tale After cutting power, I removed the switch plate to understand how much space I had and whether I could install a Shelly. Fortunately, I had plenty of space—otherwise, I would have needed to purchase a Shelly Mini ([site link]), which is much smaller and more compact.
My fan has 3 terminals: phase (L), neutral (N), and switch.
We connect the Shelly device to the same live and neutral as the fan, then connect what was previously connected to the switch to Shelly’s SW pin. The final connection scheme between Shelly and fan is as follows:
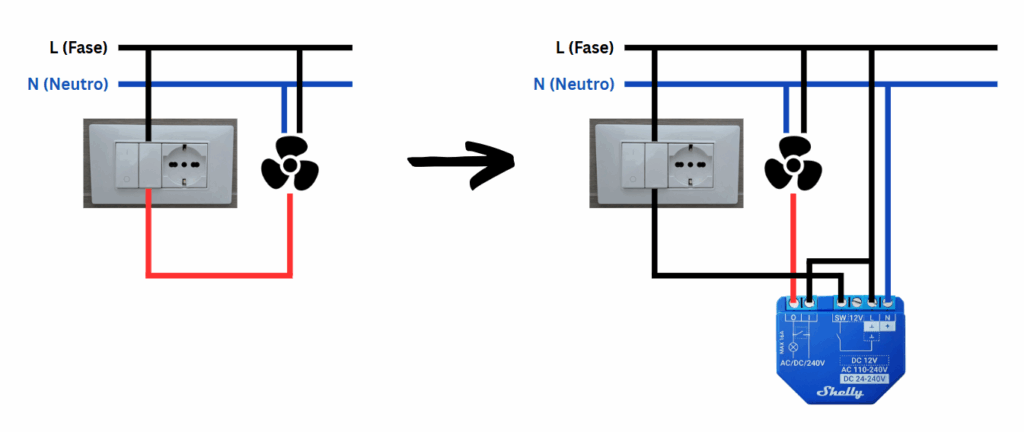
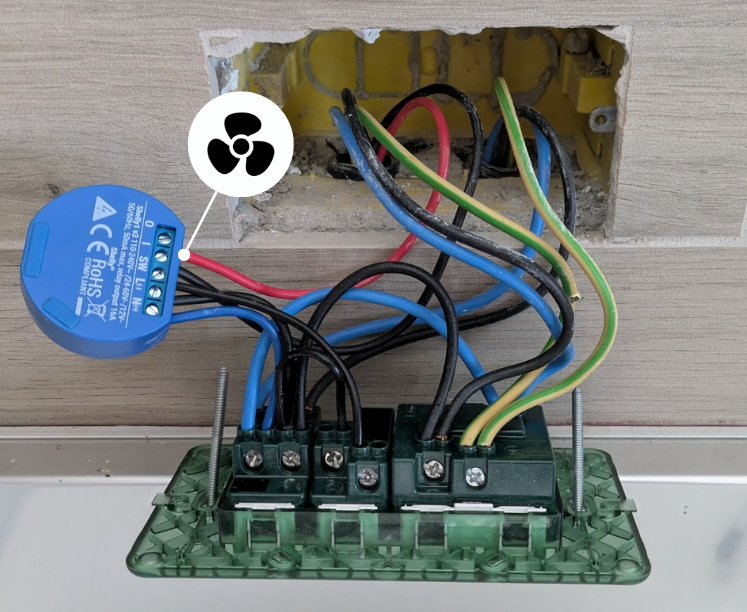
The Shelly device you see in the photo is an older version no longer available. In this article and diagram, I reference the updated version.
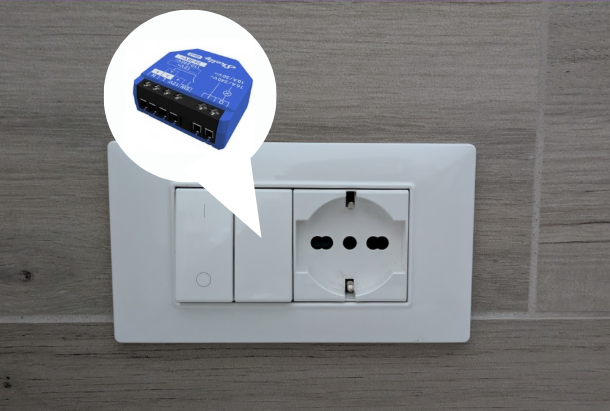
Before closing the box, we restore power and pair the Shelly with our smartphone account.
Once pairing is complete, we cut power again and restore the electrical box as it was before.
Activation test
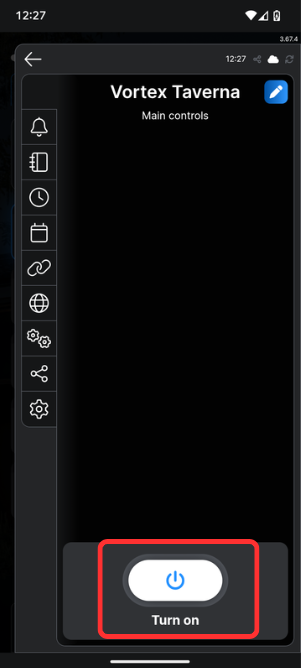
At this point, we’ll be able to start the fan from our smartphone.
Creating automatic scenes
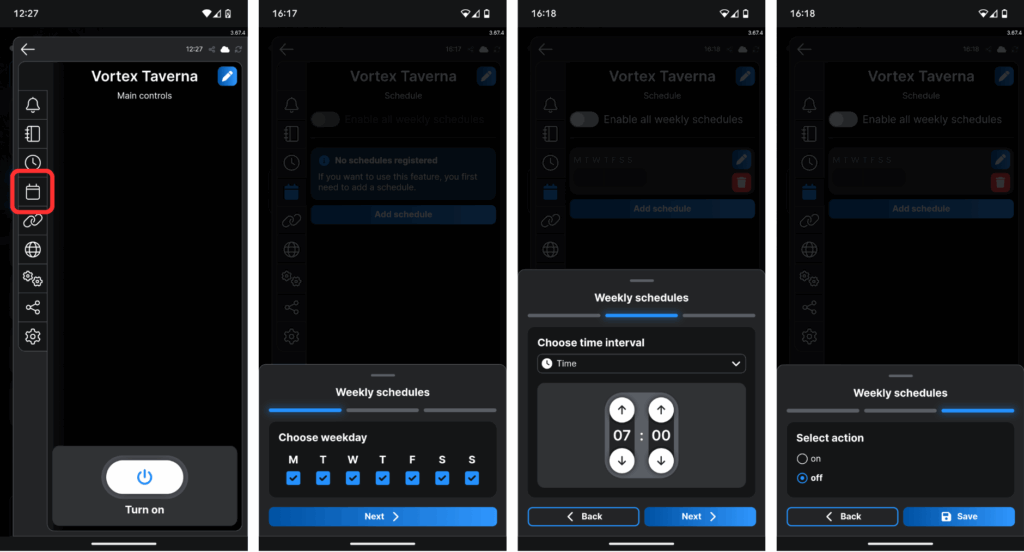
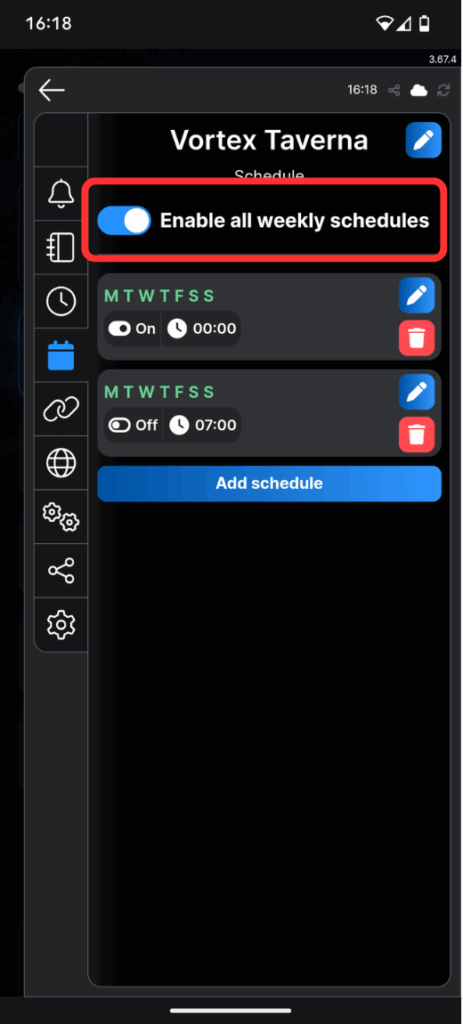
From the Shelly app, we can create an automatic activation scene, or from the device settings themselves, we can set an automatic on/off timer (scheduling section).
To activate automatic on/off scheduling, follow these steps:
In the following days/weeks/months, all that remains is monitoring radon levels and understanding how effective this intervention has been.
It’s important to remember that the radon value detected by the AirThings device refers to an average, not a precise value for that specific moment. This detail is fundamental because we shouldn’t expect to turn on the fan and immediately see a change—we’ll observe the change over the subsequent 12-24 hours.
Advanced integrations
It’s possible to create more advanced scenes between our Shelly fan and other devices, not just the radon sensor.
Some examples:
- If carbon monoxide is detected, activate the fan and send a notification
- If smoke is detected, activate the fan and send a notification
- If air quality is poor (e.g., near a kitchen), automatically activate the fan
The scenes I’ve described can be implemented using Home Assistant as a bridge between various sensors and our fan.
Conclusions
Radon is a serious problem, often overlooked due to its “invisibility.” With this project, using Shelly devices and AirThings sensors, we successfully created an intelligent system that reduced radon levels from an average of 300 Bq/m³ to 30-60 Bq/m³ (summer/winter).
Always remember that measurement is the fundamental first step: without precise data, it’s impossible to evaluate the effectiveness of any intervention. Continuous monitoring over time will allow you to further optimize the system and ensure a safer home environment for you and your family.
I hope you enjoyed this article—until next time!