


Welcome back, everyone!
Today I want to share a small “home automation” victory against a well-known Italian automatic garage door company that tried to lock me into their expensive ecosystem.
A while back, I purchased an automatic garage door for my home. I was excited about integrating it with my existing home automation system and creating sophisticated scenes that would automatically open the garage as I arrived home. To my surprise, not only did the garage door have zero smart home capabilities out of the box, but if I wanted any connectivity, I’d have to shell out an additional €300 for a proprietary module that only worked with their app via Bluetooth.
While Bluetooth is widely used in IoT contexts, I couldn’t see how it made sense for this application. What advantage would it give me over the traditional remote control? The radio range of a standard garage remote would likely exceed Bluetooth anyway.
I ended up purchasing the garage door despite this limitation, mainly because other competitors offering “smart” integration had inflated prices that made no sense.
My goal
With this project, I wanted to achieve several objectives:
- Make my garage smart even though I was told it “couldn’t be done”
- Enable remote opening/closing of the garage door
- Get real-time status of whether the garage is open or closed
Solution
As described in this article, my entire home automation setup is managed through Shelly devices with everything centralized on Home Assistant (running on a fantastic Raspberry Pi 4). For this article, Home Assistant isn’t strictly necessary since everything can be managed directly through the Shelly Cloud.
Every garage door motor includes at least one output on its control board for connecting an external open/close button. We’ll leverage this connection to add a Shelly device that simulates a simple switch.
Additionally, we’ll install a Shelly Door/Window sensor to detect whether the garage is open or closed.
Requirements/materials
- Shelly (link shop)
- Shelly Door/Window – Note: newer versions require a Bluetooth gateway like this one. In this article, I used the older version that didn’t need a gateway) – Link shop
- Wifi coverage (or using LoRa addon)
Warning Always turn off power at the breaker and work safely when dealing with electrical installations.
Step 1: making the motor smart
Understanding motor operation
The first step is determining whether your motor has provisions for an external button (99% do) and how to connect to it.
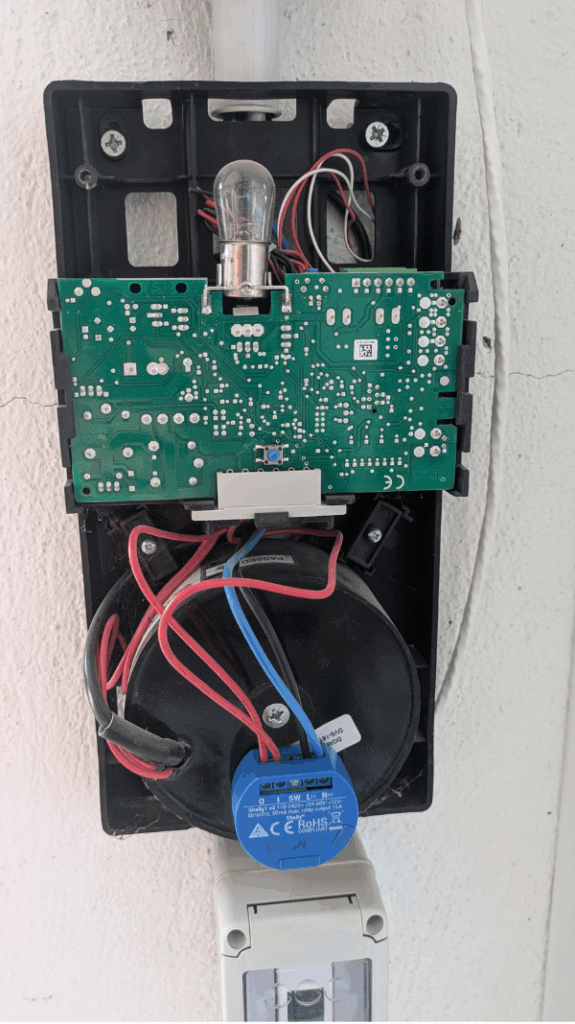
In my case, I consulted the manual (which typically includes an electrical connection diagram) to identify which pins I needed to connect the Shelly to.
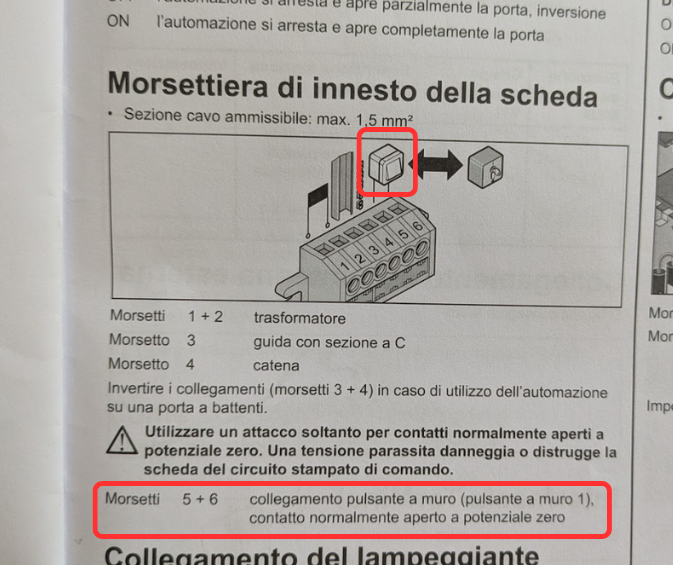
How external motor buttons work
Normally, the two pins are disconnected—this is the default state. When we bridge these pins (either through a physical button or a Shelly device), the main board detects the connection and initiates opening or closing of the garage door.
It’s important to note that we typically don’t use a toggle switch but rather a momentary button, ensuring the pins remain disconnected most of the time.
We’ll simulate this exact behavior with the Shelly.
Connecting the Shelly device to the motor
WARNING This step may void your product warranty
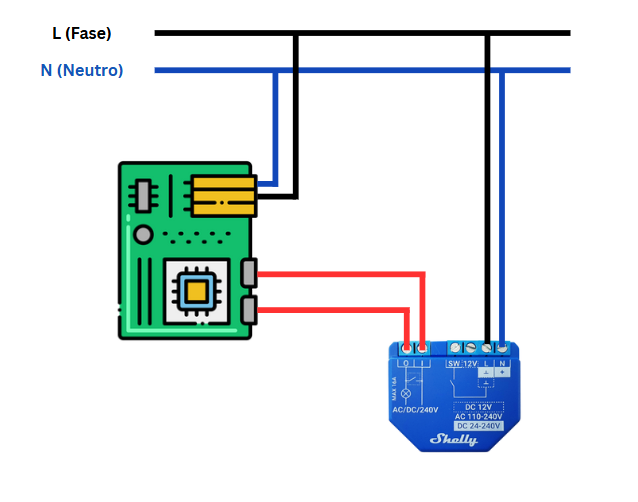
After cutting power, remove the motor housing to access the main board. The Shelly needs power to operate—I tapped into the motor’s power supply, though this depends on your electrical setup and how you want to organize the connections. The device’s power consumption is negligible and won’t affect garage door operation.
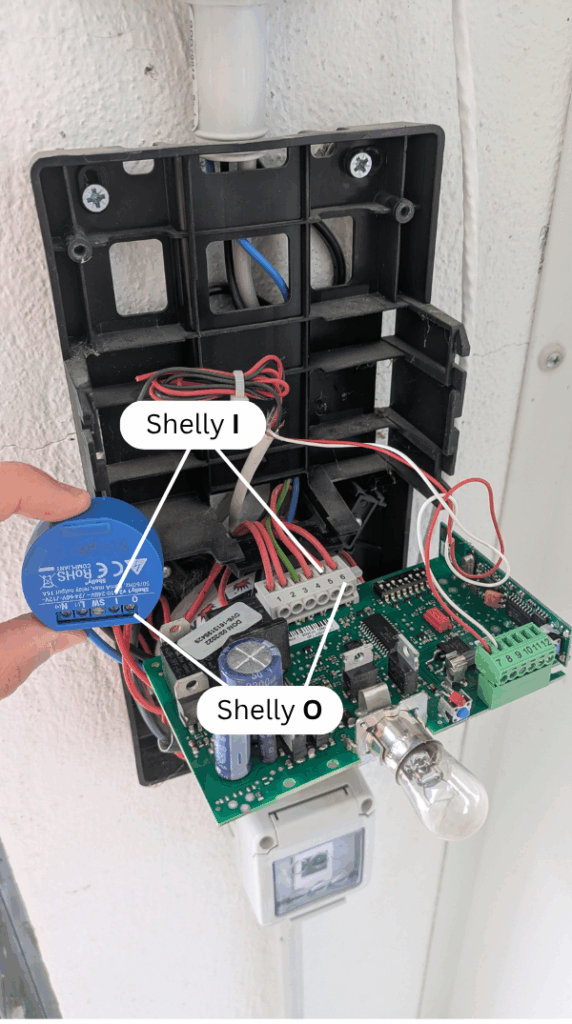
Once power connections are made, we need to connect the Shelly to the motor at the pins designated for the external button. When we bridge these contacts, the circuit closes and the main board responds accordingly.
Shelly devices are perfect for this job because they provide a “dry contact“—meaning power and output are isolated, with no current flowing through the connection. This is crucial because we absolutely cannot allow current to reach the main board terminals, as this would damage the controller!
Once all connections are made, the setup looks like this:
Shelly connection and configuration
Before closing everything up, we need to do two things: first, pair the Shelly device with our app, and second, configure the virtual button behavior. Each time we trigger “ON,” it should automatically turn off after 3 seconds. We’ll achieve this by setting an auto-off timer.
Configuration is done through the device details in the Shelly app (alternatively, you can connect to the device’s IP address for configuration).
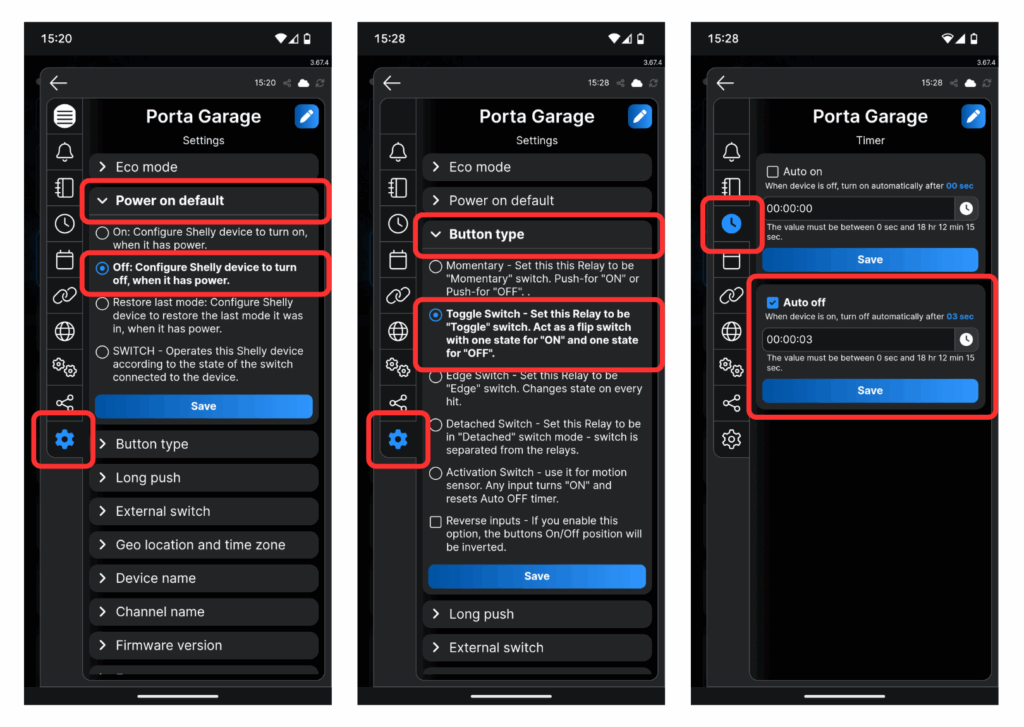
Power on default: Off → If power is lost, the Shelly will restart in the “off” state (without this setting, the garage would open every time)
Button Type: toggle switch → Behaves like a normal two-state button. State reset will be handled by a timer.
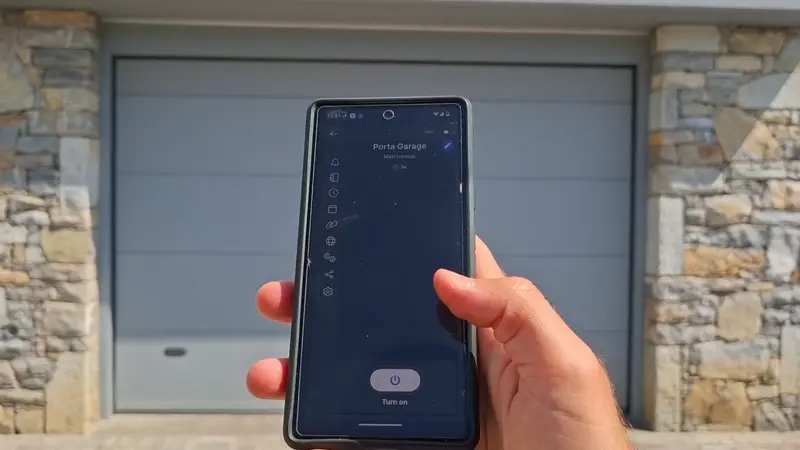
System Testing
We can now close up the motor housing, hiding the Shelly inside if possible.
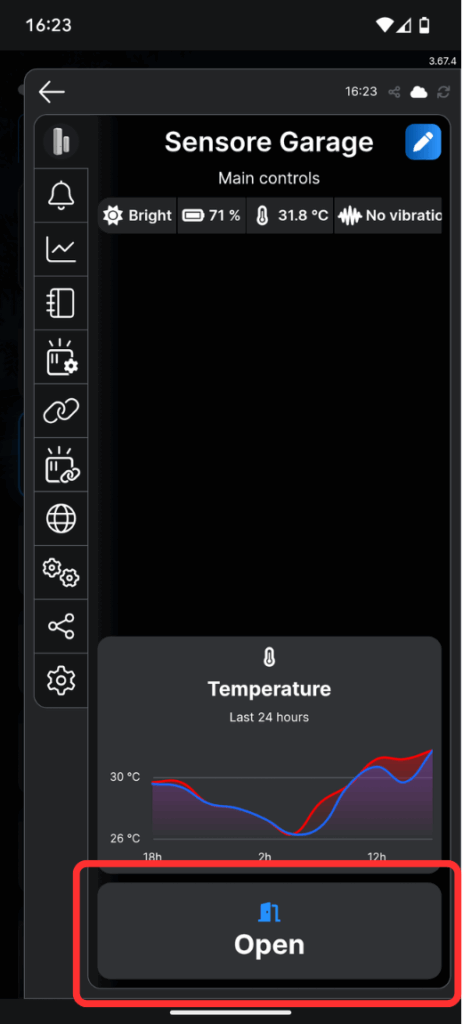
Step 2: Detecting open/closed status
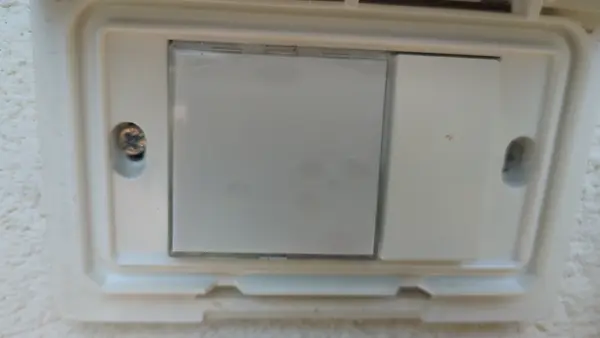
For this phase, I’ll use a Shelly Door Window 2 to determine whether the garage door is open or closed. This device consists of two parts that must be installed so the components are close together when the garage is closed.

I used a Shelly Door Window 1 (no longer available). You can use version 2, but it requires an additional Bluetooth gateway for cloud connectivity.


Once installed, connect it to the app just like we did with the other Shelly device.
In the Shelly Door Window device details, you can see whether the garage is open or closed, plus additional information like temperature, battery level, and ambient light.
Setting Up Scenes
Now that both devices are installed, we can unleash our creativity and create various home automation scenarios.
Some example scenarios:
If the garage is still open after a certain time, send a notification and automatically close it
When arming the security system, automatically close the garage if it's still open (this scenario requires more complex integration between the alarm system, Shelly, and Home Assistant)
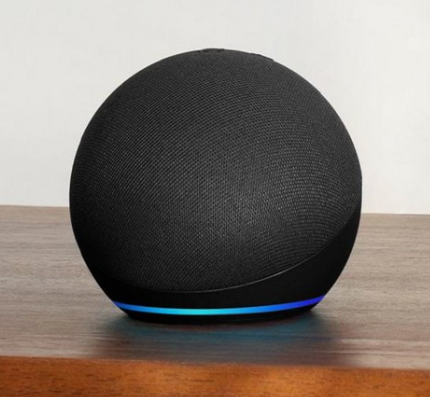
As if that weren’t enough, we can connect our Shelly ecosystem to Alexa or Google Home for voice control of our devices.

Conclusions
Would it have been worth spending €300 for the Bluetooth module they offered when I purchased the garage door? The answer is a resounding NO!
With minimal investment, we’ve made our garage smart and can know its status at any time.
Beyond this, we have endless integration possibilities between Shelly and the outside world! Over the past few years, I’ve had excellent experiences with this brand. I’ve never encountered integration issues, and the build quality is very high. I definitely recommend them.
Until next time!


